Mobile Haskell (iOS)
A lot of progress has been going on to make Haskell work on mobile natively, instead of e.g. generating JavaScript via GHCJS and using that. Unfortunately, not much documentation exists yet on how to build a project using these tools all together.
This post will be an attempt to piece together the tools and various attempts into a coherent step-by-step guide. We will start by setting up the tools needed, and then build an iOS app that runs in both the simulator and on the device itself (i.e. a x86 build and an arm build).
For the impatient and brave, simply,
- clone down the MobileHaskellFun repository,
- run
./setup-tools.shto set up the tools, cdintoOffie/hs-src/- build the package index
./call x86_64-apple-ios-cabal new-update --allow-newer, - run
./call make iOSto compile the program for iOS,
- build the package index
- and finally launch Xcode and start the simulator.
Otherwise, let's go through the steps in detail:
Setting up the Tools
A bunch of tools are needed, so we will set these up first. You might have some of these, but I will go through them anyways, for good measure. The steps will assume that we are on macOS for some parts, but it should not be part to adapt these to your system (all steps using brew).
If you don't have stack installed already, set it up with,
|
We will collect all our tools and GHC versions in a folder in $HOME—for convenience—so first we are a going to create that directory,
Next step is cloning down cabal and building cabal-install. This is necessary until new-update lands.
&&
If you have cabal-install and a system GHC already, then you can try and install it via cabal new-build cabal-install instead, which is less brittle. I wanted to remove the need to setup these though, so I went with the ./bootstrap.sh approach.
NOTE: If you are having trouble with e.g. errors on packages being shadowed, try the good ol' cabal-hell fix, and nuke ~/.ghc and ~/.cabal/.
Install LLVM version 5,
This should set up LLVM in /usr/local/opt/llvm@5/bin (or just /usr/local/opt/llvm/bin), remember this path for later.
We'll now set up the tools from http://hackage.mobilehaskell.org, namely the toolchain-wrapper and the different GHC versions we will use.
Let's start off with getting our GHCs, by downloading ghc-8.4.0.20180109-x86_64-apple-ios.tar.xz and ghc-8.4.0.20180109-aarch64-apple-ios.tar.xz, for the simulator and device respectively. You can download the by cliking their links on the website, or curl them down with (the links are probably outdated soon, so replace the links with the ones on the site),
Now, let's unpack these into their own folders (assuming you're still in ~/.mobile-haskell),
&& &&
&& &&
Next up is the toolchain-wrapper, which provides wrappers around cabal and other tools we need,
&&
And that's it! We have now set up all the tools we need for later. If you want all the steps as a single script, check out the setup script in the MobileHaskellFun repo.
Setting up the Xcode Project
Setting up Xcode is a bit of a visual process, so I'll augment these steps with pictures, to hopefully make it clear what needs to be done.
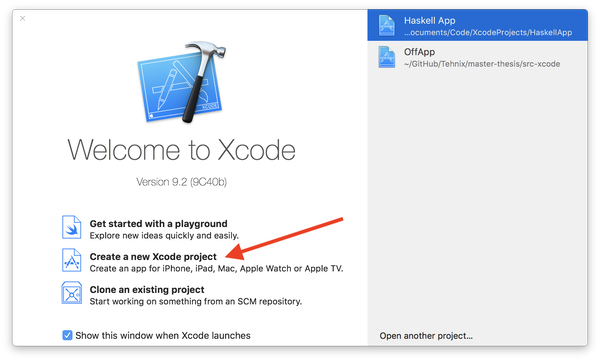
First, let's set up our Xcode project, by creating a new project.
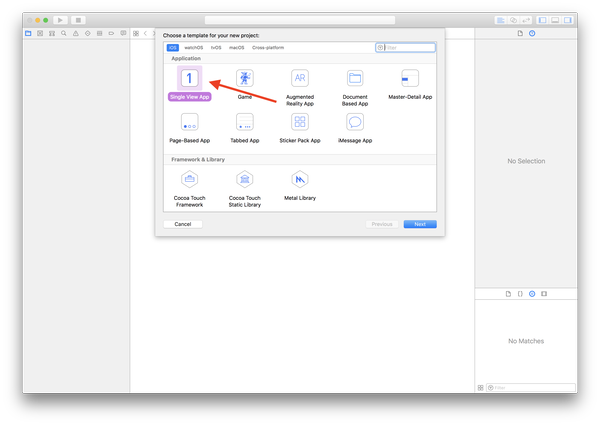
Choose Single View Application,
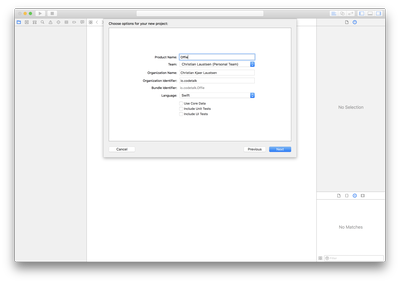
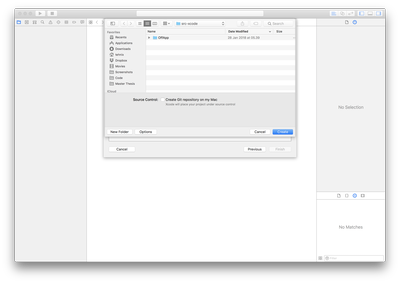
And set the name and location of your project,
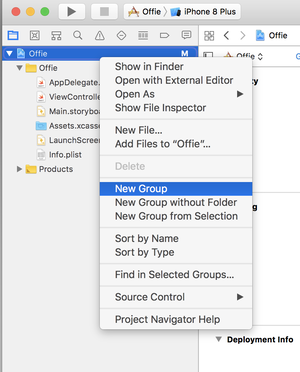
Now, let's add a folder to keep our Haskell code in and call it hs-src, by right-clicking our project and adding a New Group,
Interlude: Set up the Haskell Code
Before we proceed, let's set up the Haskell code. Navigate to the hs-src directory, and add the following files (don't worry, we'll go through their contents),
./hs-src/cabal.project
We use the features of cabal.project to set our package repository to use the hackage.mobilehaskell.org overlay.
1 packages: .
2
3 repository hackage.mobilehaskell
4 url: http://hackage.mobilehaskell.org/
5 secure: True
6 root-keys: 8184c1f23ce05ab836e5ebac3c3a56eecb486df503cc28110e699e24792582da
7 81ff2b6c5707d9af651fdceded5702b9a6950117a1c39461f4e2c8fc07d2e36a
8 8468c561cd02cc7dfe27c56de0da1a5c1a2b1b264fff21f4784f02b8c5a63edd
9 key-threshold: 3
./hs-src/MobileFun.cabal
Just a simple cabal package setup.
1 name: MobileFun
2 version: 0.1.0.0
3 license: BSD3
4 license-file: LICENSE
5 author: Your Name
6 maintainer: email@example.com
7 copyright: Your Name
8 category: Miscellaneous
9 build-type: Simple
10 cabal-version: >=1.10
11
12 library
13 hs-source-dirs: src
14 exposed-modules: Lib
15 build-depends: base >= 4.7 && < 5
16 , freer-simple
17 default-language: Haskell2010
./hs-src/Makefile
The Makefile simplifies a lot of the compilation process and passes the flags we need to use.
1 LIB=
2
3 ARCHIVE=
4
5 : 6 :
7 8 9 10 :
11 12 13 14 15 16 :
17 18 19 20 21 :
22 23 24 25 26 :
27 28 29 30 31 : 32 : 33 : 34 : 35 : 36 : 37 : 38 : 39 : 40 :
41
./hs-src/src/Lib.hs
Our Haskell code for now, is simply some C FFI that sets up a small toy function.
1
2
3
4
5 -- | export haskell function @chello@ as @hello@.
6 foreign export ccall "hello" chello :: IO CString
7
8 -- | Tiny wrapper to return a CString
9 chello = newCString hello
10
11 -- | Pristine haskell function.
12 hello = "Hello from Haskell"
13
./hs-src/call
We use the call script to set up the various path variables that point to our tools, so we don't need these polluting our global command space. If you've followed the setup so far, the paths should match out-of-the-box.
1 #!/usr/bin/env bash
2 # Path to LLVM (this is the default when installing via `brew`)
3
4 # Path to Cross-target GHCs
5
6
7
8 # Path to tools.
9
10
11 # Path to Cabal HEAD binary.
12
13
14 # Pass everything as the command to call.
15
Compiling Our Haskell Code
First off, we need to build our package index, so run (inside hs-src),
Now we can build our project by running make on our target. For now, we have only set up iOS, so this is what we will build.
CABAL=x86_64-apple-ios-cabal
)
) ( & )
) ( & )
& )
We should now have our library file at hs-src/binaries/iOS/libHSMobileFun.a. If you change your project, to will probably need to run ./call make clean before running ./call make iOS again.
Back to Xcode
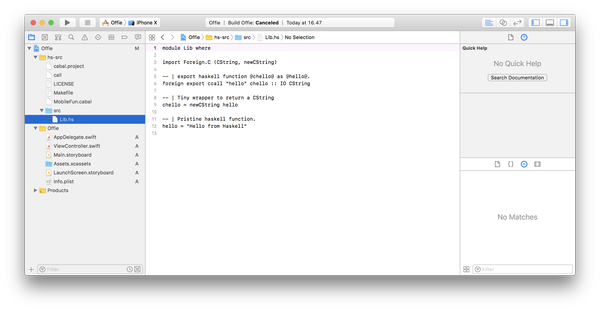
Now we need to tie together the Haskell code with Xcode. Drag-and-drop the newly created files into the hs-src group in Xcode (if it hasn't found it by itself).
And set the name and location of your project,
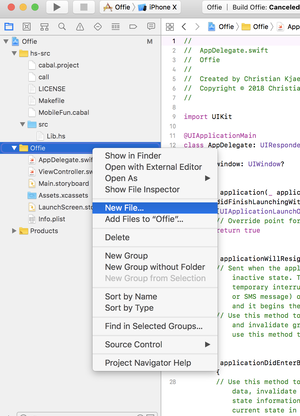
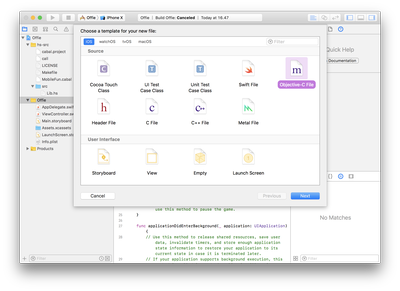
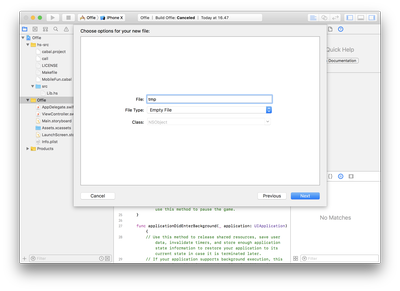
Since we are using Swift, we need a bridging header to bring our C prototypes into Swift. We'll do this by adding an Objective-C file to the project, tmp.m, which will make Xcode ask if we want to create a bridging header, Offie-Bridging-Header.h, for which we will answer yes.
./Offie-Bridging-Header.h
In our bridging file, Offie-Bridging-Header.h, we add our prototypes that we need to glue in the Haskell code,
1 extern void ;
2 extern char * ;
./AppDelegate.swift
Now let's go into AppDelegate.swift and call hs_init to initialize the Haskell code,
1 import 2 3 @UIApplicationMain
4 class AppDelegate: UIResponder, UIApplicationDelegate 5 6 7 8 9 10 11 12 13 14 15 16 17 18 19
./ViewController.swift
Next, we will set up a label in a view controller. You can either set this up in the story board and connect it via an IBOutlet.
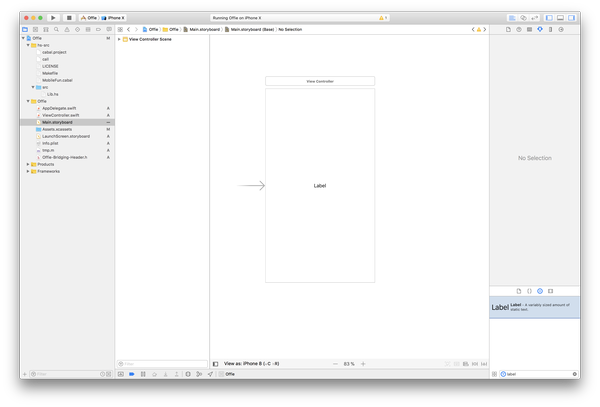
First go into the Main.storyboard and create a label element somewhere on the screen.
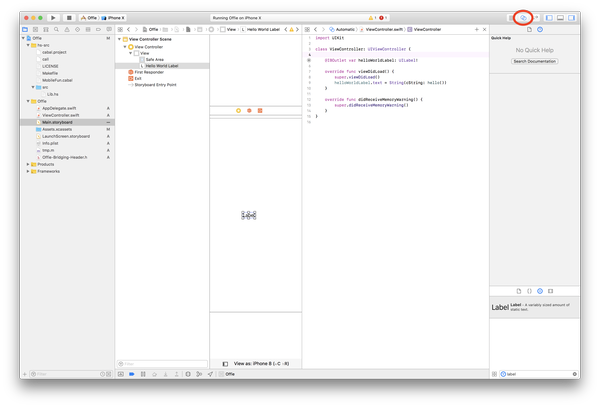
Then enable the Assistant Editor in the top right cornor, and ctrl-click on the label, dragging it over to the ViewController.swift and name helloWorldLabel.
We can now set the text of the label by calling our Haskell function with cString: hello(), making our ViewController.swift look like,
1 import 2 3 class ViewController: UIViewController 4 5 6 7 8 9 10 11 12 13 14 15
Linking in our Haskell Library
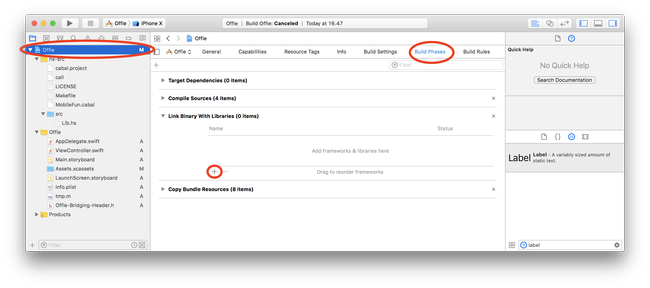
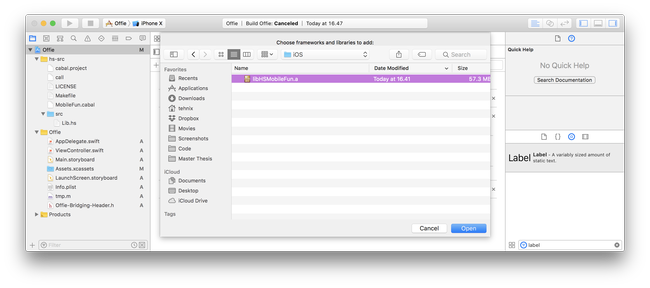
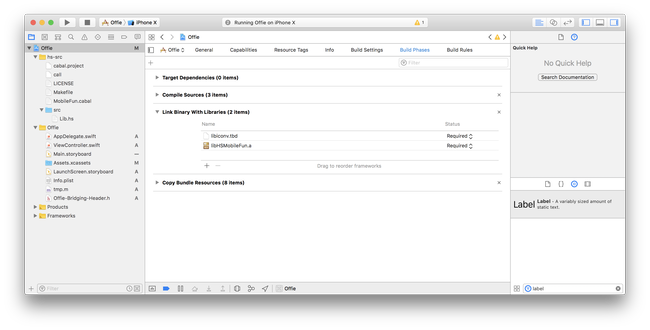
The final step we need to do, is linking in our library that we built earlier, hs-src/binaries/iOS/libHSMobileFun.a, so that Xcode can find our C prototype functions.
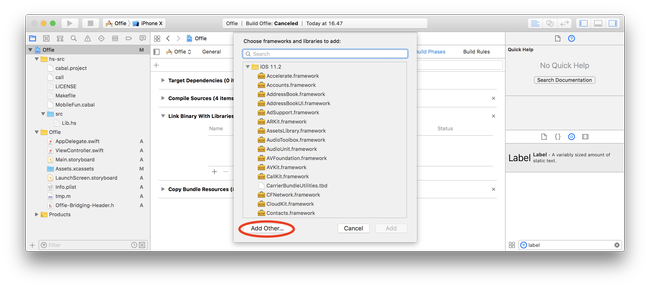
We do this by going into Build Phases, which is exposed under the Xcode project settings, and click the + to add a new library,
Choose Add Other... to locate the library,
and finally locate the library file in hs-src/binaries/iOS/libHSMobileFun.a,
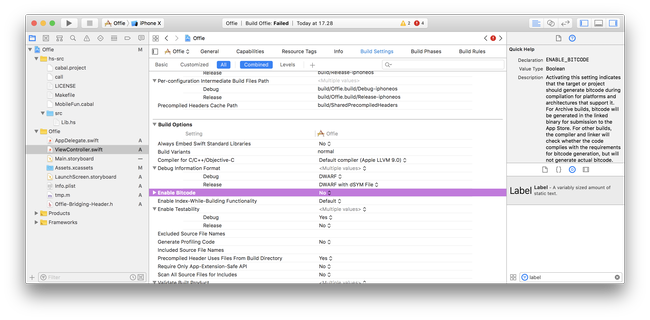
We also need to set the build to not generate bytecode, because we are using the external GHC library. This is done under Build Settings, locating Enable Bitcode (e.g. via the search) and setting it to No.
Run the Code!
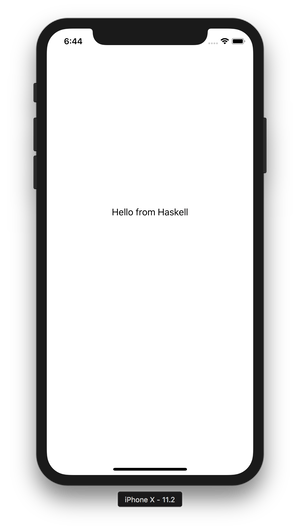
Final step, let's run our code in the simulator
Congratulations! You're now calling Haskell code from Swift and running it in an iOS simulator.
Resources
Most of this is gathered from:
- A Haskell Cross Compiler for iOS and some of the other medium posts.
- Various issues on the mobile-haskell/hackage-overlay (#5, #2).
- The preliminary user guide.
If you are interested in following the development of Haskell in the mobile space, I recommend following @zw3rktech and @mobilehaskell.
Finally, let me know if something is not working with the MobileHaskellFun repository. I haven't dealt that much with setting up Xcode projects for sharing, so I'm a bit unclear on what settings follow the repository around.

